How to Use a Custom Domain for Your Bluesky Handle
Posted Nov 18, 2024, Updated Nov 19, 2024Tags: bluesky, dns, domains, hosting, social media
Even though I'm not really active on social media these days, after hearing about so many people making the move from X to Bluesky in the past couple of weeks, I finally decided to check it out, and so far I've been pleasantly surprised with the experience.
One of the first things I noticed was that you can use a custom domain for your Bluesky handle, which I thought that was pretty cool, so I decided to give it a try. Not only was it super easy to setup, it really makes your profile stand out.
Once setup, instead of using @gregchetcuti.bsky.social for my Bluesky handle, I can use @greg.ca, which is a lot shorter, cleaner, and depending on your domain, more memorable.
This is what your profile will look like without a custom domain:

And this is what your profile will look like with a custom domain:

Alright, let's begin.
First, login to your Bluesky account. Then in the left-hand menu, click on Settings.

In the middle of the screen, click on Account.
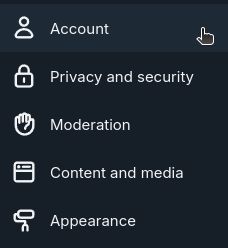
And then click on Handle.
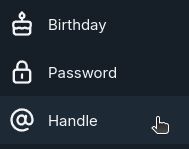
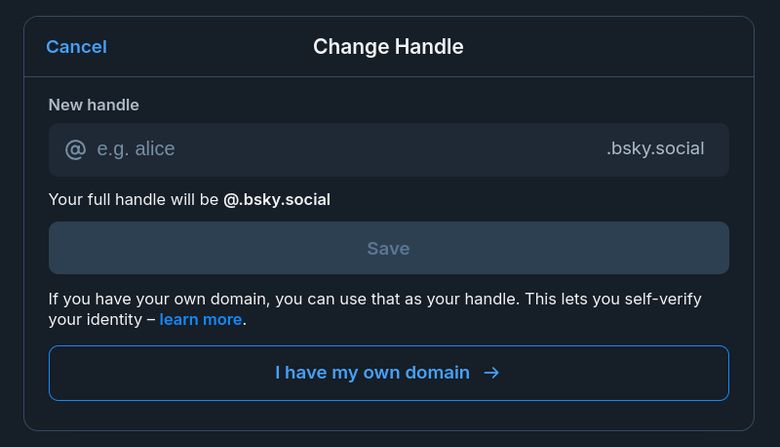
On the Change Handle screen that pops up, click on I have my own domain.
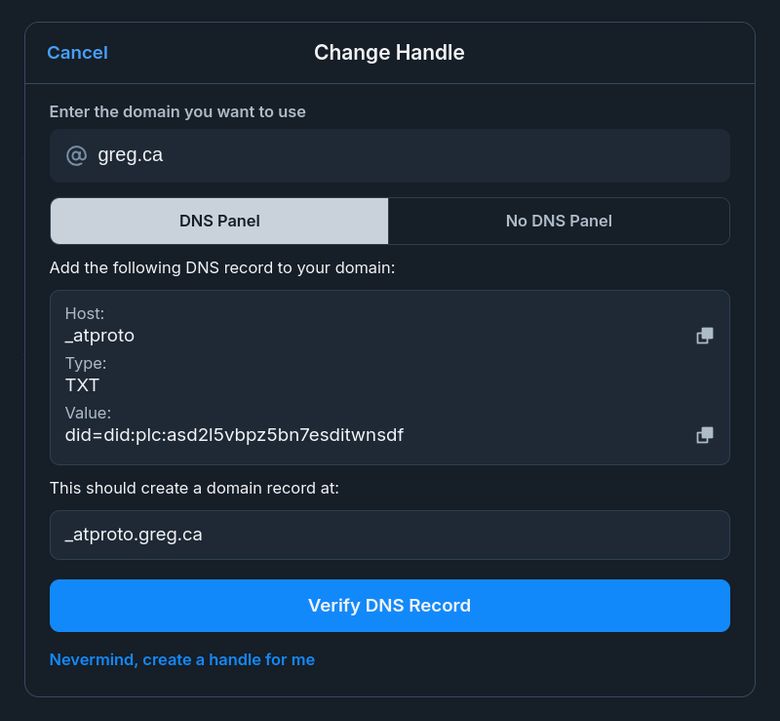
On the new Change Handle screen:
-
In the Enter the domain you want to use field, enter the domain you want to use.
-
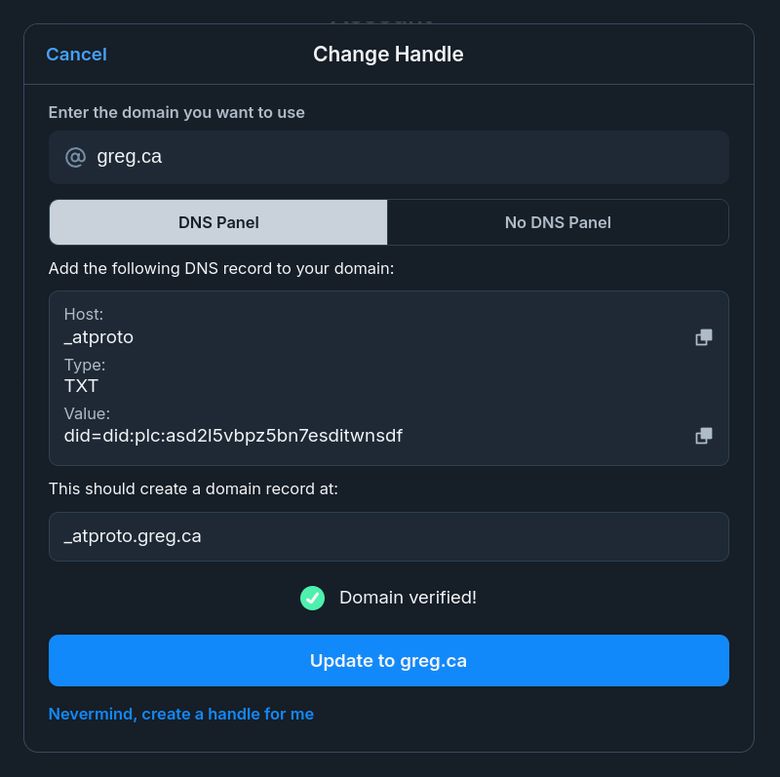
Copy the TXT record value, in this example is would be did=did:plc:asd2l5vbpz5bn7esditwnsdf.
-
Login to wherever you manage the DNS records for your domain, and create the TXT record _atproto.YOURDOMAIN with the value you copied in step 2.
Your DNS TXT record should look something like this:

You can try to click on Verify DNS Record right away, but it may take a bit of time for the DNS record to propagate, so you might need to wait a bit before you try to verify the domain.
Once the DNS record is verified, you'll see the below, "Domain verified!" success message. When you see this message, click on Update to YOURDOMAIN.
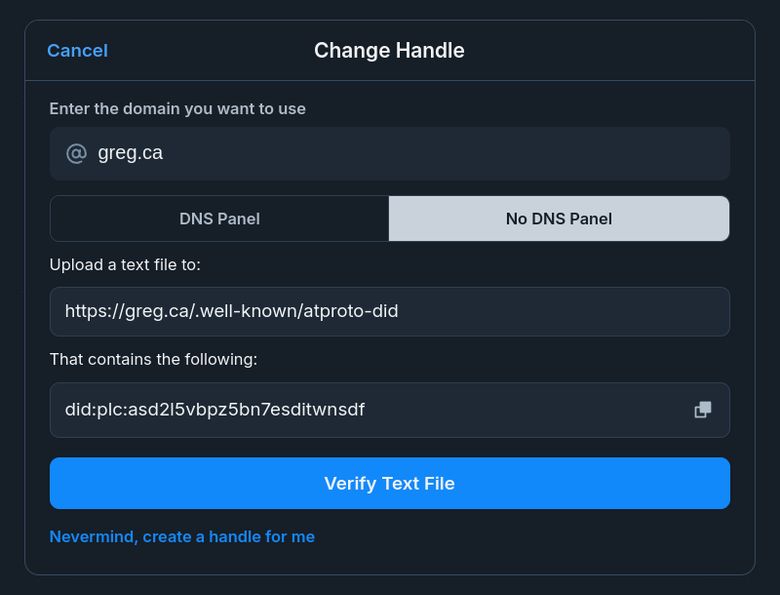
If you don't have access to your domain's DNS records, you can also use a custom domain with Bluesky by creating a text file and hosting it on your domain.
You'll need to create the file:
/.well-known/atproto-did
The contents of this file should contain nothing but the value you copied in step 2 (in the example, did=did:plc:asd2l5vbpz5bn7esditwnsdf).
Once you've uploaded the file to your domain, click on Verify Text File.
Once the text file is verified, you'll see the below, "Domain verified!" success message. When you see this message, click on Update to YOURDOMAIN.
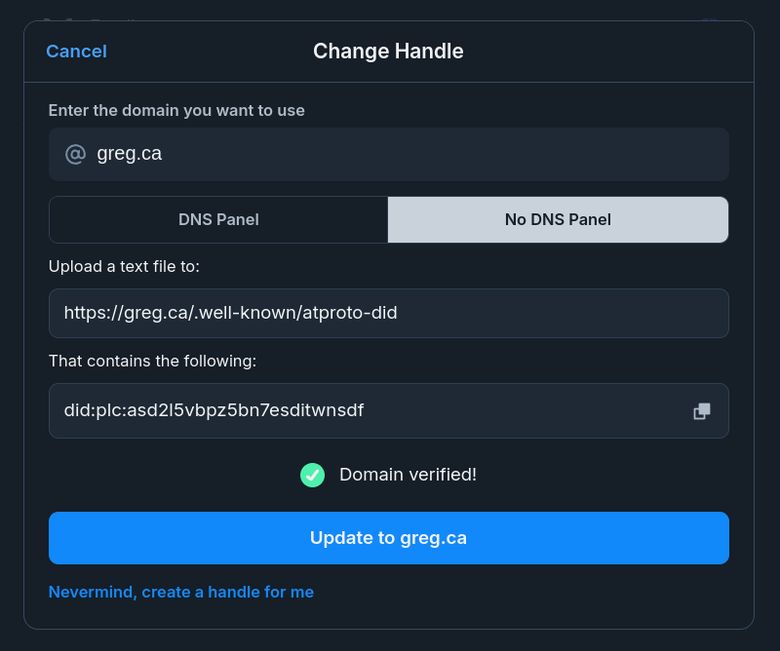
That's it, you can now enjoy Bluesky with your fancy new custom domain!

And now that you're all setup, feel free to give me a follow, even though I literally haven't even posted there yet and probably won't be very active.
Post Last Updated: Nov 2024. RSS Feed
Built with Eleventy, Tailwind CSS, daisyUI. Theme based on the SP 1976 colour palette.
Copyright © 2025 Greg Chetcuti. All rights reserved.

